Pets are adorable. They are cute, sometimes fluffy, and make the best companions.
Which is why, as pet parents, we always feel like pampering them. But there comes a time when we might get anxious to act on it.
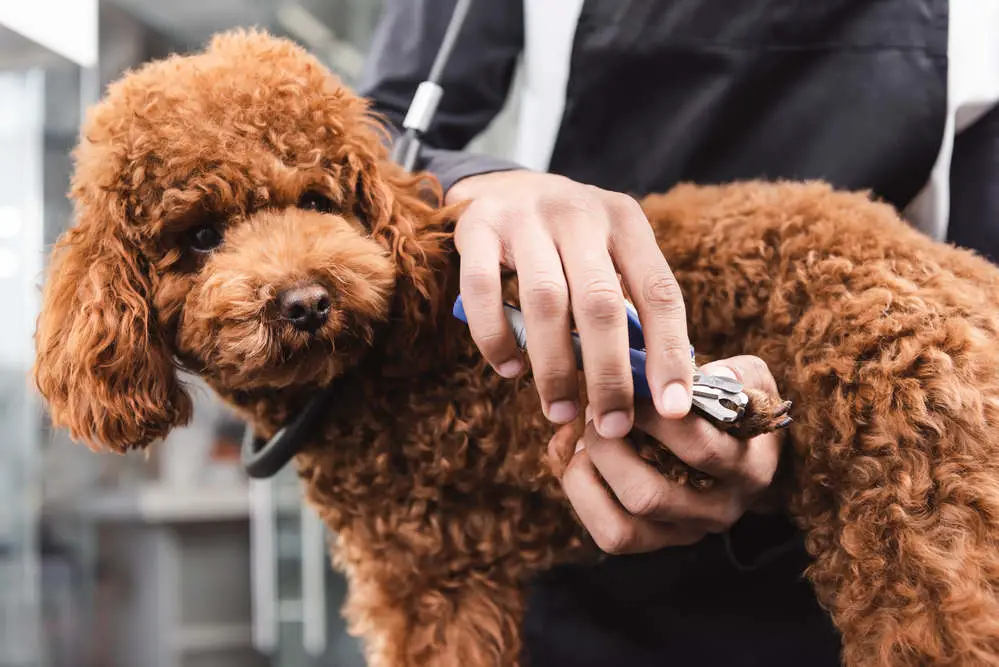
We’re talking about clipping nails, especially for a dog.
Good news—we’re coming to your rescue.
- Why Is Cutting Your Dog’s Nails Important?
- What If You Miss Out on Clipping the Nails?
- When Do You Figure Out If Your Dog Is Ready for Nail Clipping?
- A Step-By-Step Guide to Preparing Your Dog for Nail Clipping
- Tips If You Are a Beginner in Using Dog Nail Clippers
- When to Stop Clipping Your Dog’s Nails?
- Safety Precaution to Take While Using Dog Nail Clippers
- A Smart Hack to Use Dog Nail Clippers Easily
- Types of Nail Dog Clippers and How to Use Them
- Choosing the Right Dog Nail Clipper
- Extra Tips on Using Dog Nail Clippers
- Parting Thoughts
Why Is Cutting Your Dog’s Nails Important?
Before we get into the process, let’s talk about the importance of clipping nails, just in case you’ve thought of skipping it (yeah, we know clipping nails is not as easy as it seems).
Dogs’ nails are broad at the toe and narrow as they grow.
Within each nail is a quick that is pink in color and very sensitive. It’s because it supplies blood to the nail and its root.
If this quick get accidentally cut, it can cause bleeding and pain for your dog.
But, if you clip your dog’s nails regularly and in the correct manner, the quick begins to recede to the root of the nail.
This minimizes a lot of your dog’s pain and also makes you both ready for another smooth clipping session.
What If You Miss Out on Clipping the Nails?
Not only will the nails grow, but so will the quick. This could complicate the nail clipping process even more.
Unkept nails can also make your dog’s feet spread out and reduce the foot’s grip. In the long run, it can further distort the foot shape and cause injury to the foot.
If the dog can’t walk with its big toenails, he will put uneven pressure on his entire leg, leading to a distorted paw.
If your dog accidentally puts pressure on its long nails while, say, running around, or if his nails get trapped in something, it will hurt him as the pressure will be unbearable for his feet and legs.
Long nails will also take away the dog’s comfort in walking and playing around. They can even infect his paw pads.
This sounds pitiful, no?
Let’s take this as an opportunity to schedule a clipping session for your dog baby and relieve him from the stress.
Also Read: Why Does My Dog Have Diarrhea at Night?
When Do You Figure Out If Your Dog Is Ready for Nail Clipping?
If you notice that your dog is tumbling while walking or making a clicking sound when he moves around, you might want to check his nails.
If the nails are touching the ground, there you go, it’s time to get rid of the extras.
A Step-By-Step Guide to Preparing Your Dog for Nail Clipping
Here comes the crucial part. And, we bet you, you can’t fool your dog into this one. He must know why the clipper is coming to him.
So, be a responsible parent and show your dog your intentions. Plus, make him comfortable with the change.
You can achieve this with the below steps:
Step 1: Touch and play with your dog’s feet until you make the feet’s handling comfortable.
Step 2: Show him the clipper by holding it in front of him or allowing him to sniff or play with it. A known object for your dog would be better to deal with, no?
Step 3: Place the nail clipper against his paw. Observe how he reacts to it. If he grows uncomfortable, be patient. You can imitate the touching of your toes and smile, giving him the impression that this is fun.
Step 4: Once the dog is comfortable with the clipper touching him, go the extra mile, hug him, or give him a bite of his favorite food.
Exclaiming “yay!” after every successful touch could be fun too!
The point is, that he must associate happiness with the clippers.
Step 5: Squeeze or grind the clipper in the air. Don’t clip his nails yet. Repeat this until the dog gets familiar with the sound and does not resist it.
Step 6: Now comes the actual part. Take the tiniest, mind you, a section of the dog’s nail under the clipper, and see how your dog reacts.
If he is fine with it, you win. If not, withdraw the clipper, and repeat the previous step.
Don’t forget to reward each little win.
Also Read: How to Trim Dog Nails That Are Overgrown
Tips If You Are a Beginner in Using Dog Nail Clippers
Check If Your Dog Is Ready
By this, we mean, check your dog’s mood. If he is happy and relaxed, you can walk over to him with the clipper.
Start Small and Carefully
Never start clipping big sections of the dog’s nails. The reason, you might cut the quick—remember, the sensitive portion we talked about?
So hold the nail in the clipper with the right pressure and cut the tiny part that you’ve initially practiced to only hold it. Then repeat the clipping with other toenails too.
When to Stop Clipping Your Dog’s Nails?
If you’re lucky, your dog will have clear nails. You can thus spot the pink quickly and easily.
But, if the nails are dark and pigmented, you need to be extra careful.
You can start by clipping the minimum part of the nail.
Then, look for a black dot in the center or a pulpy like thing inside. If it looks far away or not clearly seen, you can further clip a little bit.
If the dot is visible, you need to stop clipping.
If the dog has thin nails, look for the part of the nail where you can see the skin. You can stop clipping right there.
You can go further and even file your dog’s nails when you feel the dog is ready.
In both cases, you have to ensure your clipper is at a safe distance from the quick.
Also Read: Do Dogs Have Retractable Claws?
Safety Precaution to Take While Using Dog Nail Clippers
For safety’s sake, keep with you some cornstarch or a styptic powder in case you accidentally chop the quick and it starts bleeding. These are safe, antiseptic options to handle minor cuts and bleeds effectively at home.
A Smart Hack to Use Dog Nail Clippers Easily
You can do the process during mealtime. You can even put a food plate in his sight.
Why?
Because that is the time your dog is more likely to be hungry. Also, his attention will be drawn to the food and hunger rather than what you are doing to his feet.
If the dog has a furry paw and the nails are not clearly visible, wet the paw. Then push the wet fur aside. The nails will now be exposed.
Types of Nail Dog Clippers and How to Use Them
We guess you have learned the skill by now. Let’s explore the tool to perform the skill.
The Scissor Style Nail Clipper
As the name has it, this clipper cuts the dogs’ nails scissor style. Just like you chop the hair.
Especially if your dog has larger claws, using a scissor style clipper would be a good choice.
If your dog is patient and cooperates with you, you can quickly chop off the extra nails and you’re done.
If your dog still looks nervous or is a smaller pup, you might want to skip this style of the clipper. First, it’s too large a tool for them. And you might accidentally cause them a splinter if their nails are brittle.
It’s good and comfortable to handle, though, as the grip of it lies in your hands.
The Grinder Style Nail Clipper
The name sounds scary, but this is another safe option to clip your dog’s nails. There are no blades here, and you don’t have to cut anything.
The grinder has a cylindrical shaped part at its top. You trim nails with that.
You get a complimentary charging cable and a grinding wheel tip along with the grinder.
The grinder can be used in two ways:
- With the Plastic Cap: There is an already attached plastic cap on the cylindrical wheel. You can keep the cap on if you have a small pup. Or, if your dog has brittle claws.
- Without the Plastic Cap: You can manually remove the plastic cap, if you have a larger dog. Also, if you’re confident in exposing your dog’s nail directly to the grinder.
You can change the grinder’s tip end manually with whichever one suits your dog best.
How Do You Use a Dog Nail Grinder?
Switch on the grinder and start with a medium level grinding speed. Once your pet gets comfortable, you can increase the speed.
As you switch on the grinder, the grinding tip rotates and vibrates. You can place it at the tip of the dog’s nail and make tiny movements, till the nail is filed to its desired length.
The grinder clipper is easy to use. Sometimes, the grinding noise from the machine can cause nervousness or anxiety in your dog.
Besides, you need to be patient while you grind. It’s not like the other options—a quick snip and you’re done.
It’s also safe to use, as you are less likely to have the quick exposed or have an injury.
The Guillotine Style Nail Clipper
This one is safe for even the tiniest puppies and the ones with brittle claws. They are less likely to cause splinters too.
Guillotine style clippers have a hole and a blade that cuts the nail. Simply place a part of your dog’s nail inside the hole, and then press the blade to cut the nail off.
Tip: Hold the clipper with the screws facing upwards and the blades facing downwards.
Choosing the Right Dog Nail Clipper
With these three options, you might be thinking, which one would be better for your dog?
Long story short, if you have a pup or a dog that’s nervous, you could try the guillotine clipper.
Try a scissor style clipper if your dog has larger claws. Or, if he is a big dog and comfortable with the tool.
For sensitive claws or medium-sized dogs, the grinder style will be ideal.
In all cases, the nail clipper should be sharp to get the job done efficiently.
Extra Tips on Using Dog Nail Clippers
You could have someone by your side to handle and caress your dog while you do the trimming.
You can also seek a professional to do the job, but it can be expensive. Also, we are not sure if your pet would gel with a stranger, so do keep that in mind.
Also Read: Can You Use Human Nail Clippers on Dogs?
Parting Thoughts
Each dog needs different care. So, first and foremost, get to know your dog. You can probably explore all three options to find the best tool.
In the end, the choice is yours, but we believe you will make the best choice for your dog.